
It is very easy to make your own homemade bouillon if you are already making chicken stock (or any other kind, for that matter). (I would not recommend that you use the purchased broth.) Since I discovered how to do this, I no longer have multiple jars of broth in my freezer, and also don't have to remember to take a jar out and let it defrost before I can use it.

Plan on starting with a generous amount of broth, because it cooks way down. I started with a little over 3 quarts of broth (because that's all my pot would hold). Add the broth to the pot and bring to a boil, uncovered, then continue to boil until it starts to thicken a bit. (Mine took about 2 hours from start to finish.) If a scum forms on the top, skim it off. After the first hour or so, keep a close eye on it because you don't want it to burn. When it coats the back of a spoon, it is done. As you can see, although mine is chicken broth, it is fairly dark in color. This is because I always roast my chicken bones before making the broth, although that is not necessary. I feel it gives a richer flavor.


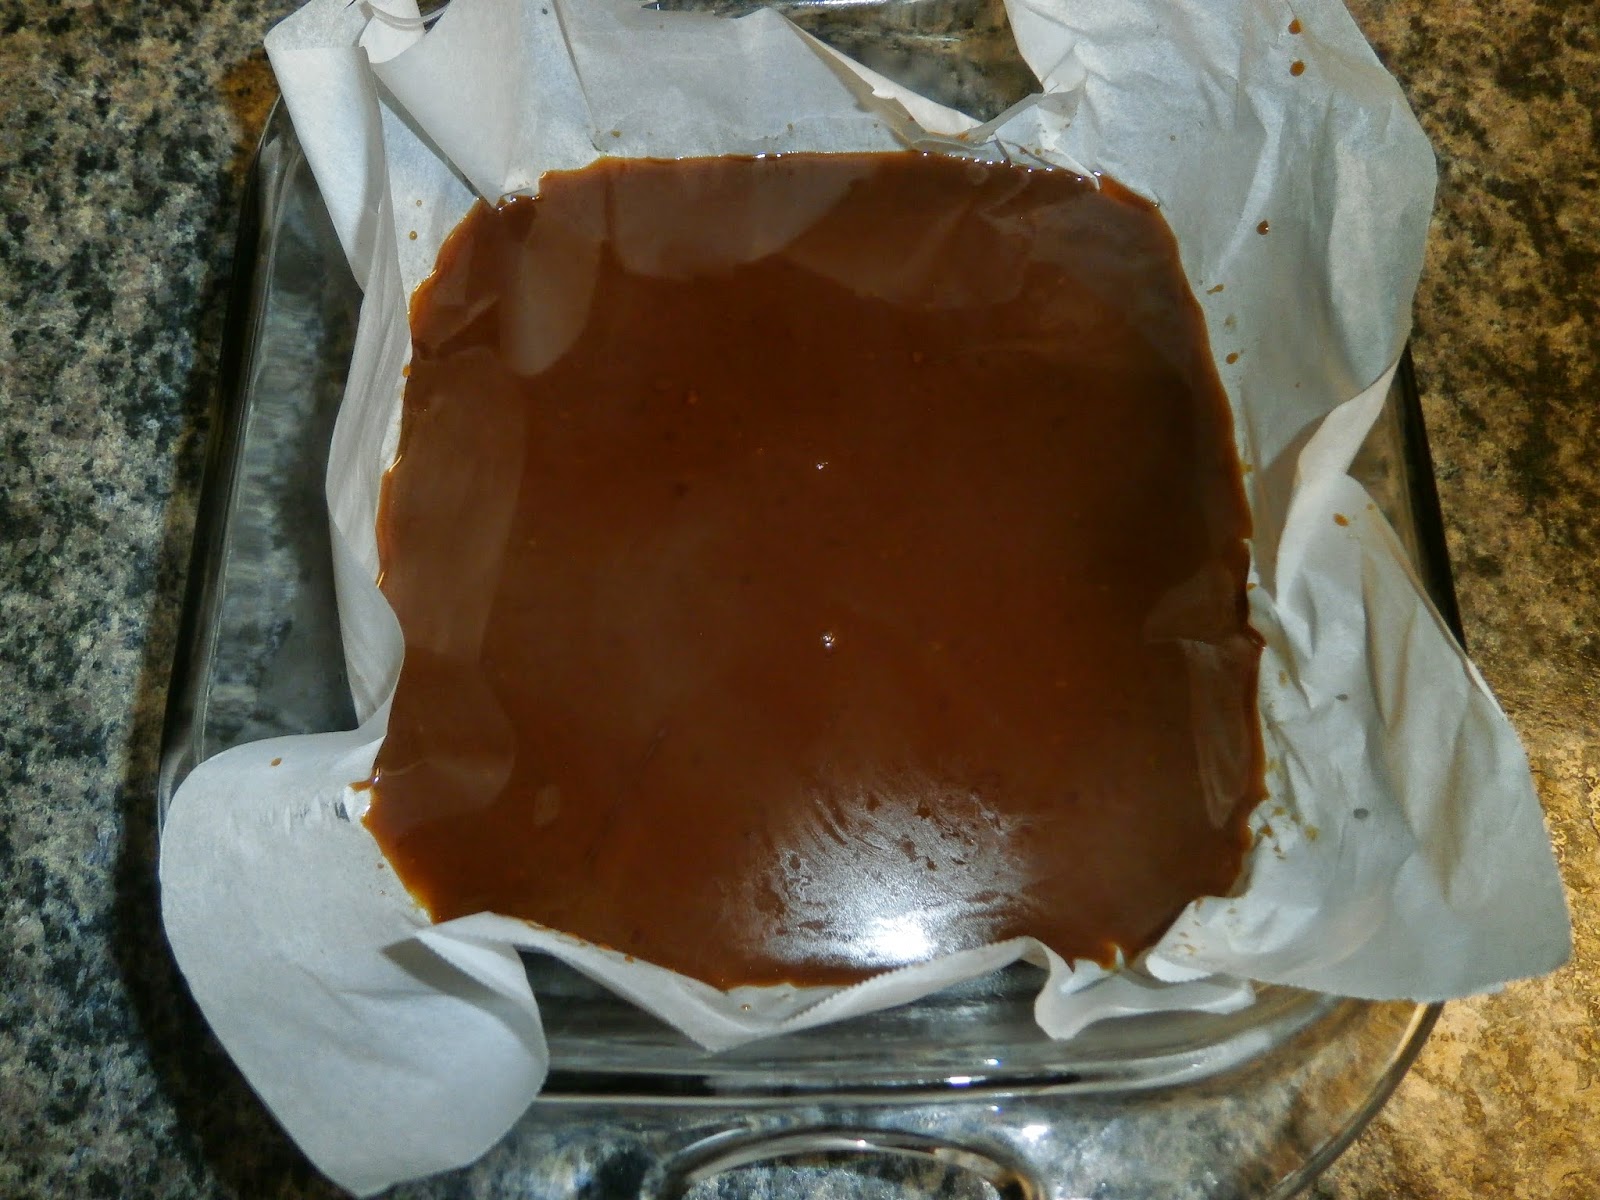
The first time I did it, I poured it out on a parchment paper covered cookie sheet, but this time I used a parchment paper lined 9" x 9" casserole dish to keep the final product in a more uniform shape. You can also use plastic wrap instead of parchment paper, but you will want to cool the broth down until it is just barely warm before transferring it. Put it in the refrigerator to let it cool completely, and then turn out of pan, peel off parchment paper, and cut into cubes (it should have gelled to a consistency of Jello). I cut mine into quarters one way and then quarters again the other way, ending up with 16 cubes. After doing the math, that worked out well to make each cube the equivalent of approximately 1 cup. To use, add cube to one cup of hot water to reconstitute. It will keep in the refrigerator for up to a month, but I chose to freeze mine, separating the cubes slightly, and put in freezer bag and return to freezer.
If yours didn't gel, you may not have boiled it quite long enough, or your original broth didn't have much collagen in it. A great way to add collagen (which is super healthy) is to add chicken feet to the bones - I get mine from a local Asian market. Even if yours didn't gel, it is really good stuff. Pour into ice cube trays, freeze and then transfer to a freezer bag and keep frozen. It takes up much less room to store and is ready to use on short notice.
0 comments:
Post a Comment